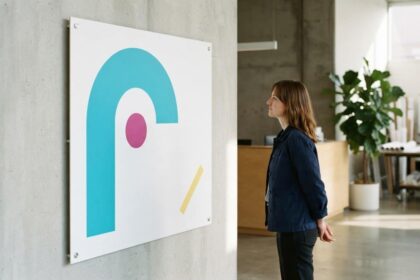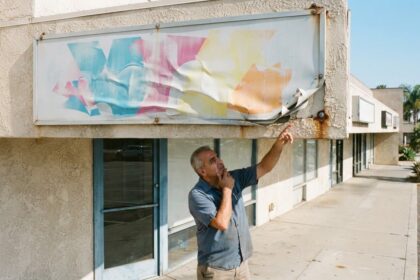

The right mounting method depends on the panel material, mounting surface, and setting. Mounting services for rigid signs may use adhesive or mechanical fixings, while acrylic panels can also be displayed with standoffs or cable-and-rod systems. The right choice keeps the sign secure and delivers the intended finish.
A polished display matters, but each material calls for a different approach. Foamboard, PVC, acrylic, and aluminum composite (ACM) panels are not suited to the same hardware. A wall-mounted sign also has different placement needs from a freestanding display.
This guide covers mounting options, how material and location affect the choice, and what to prepare before installation. You’ll learn when a simple setup is practical and when the panel, hardware, or placement calls for a tailored solution, so your custom sign is ready to make the right impression.
Key Takeaways
- Installation planning starts with the panel, mounting surface, access, and any equipment the job may require.
- Foamboard, PVC, acrylic, and ACM each call for a mounting approach suited to the material and display setting.
- Drilled holes and metal spacers create a separated, dimensional look for wall-mounted panels.
- Diabond’s lightweight composite construction makes hardware choice and panel placement important parts of the installation plan.
- Match the hardware to the location and intended presentation; some lightweight displays can be set up simply, while other installations need a more tailored approach.
Ready for a Sign Install Done Right?
Professional mounting services for rigid signs start with the panel, mounting surface, and access conditions. If the sign was fabricated elsewhere, define the installation scope before delivery. Clear details help coordinate hardware, site preparation, and scheduling with the finished sign.
Installation-Only Services
Installation-only work covers mounting a sign fabricated elsewhere, rather than producing the panel. To plan the attachment, the installer needs details such as material, dimensions, weight, orientation, and supplied hardware. A panel with predrilled holes, for example, requires different preparation from one designed for adhesive mounting.
Clarify who handles delivery, hardware, and adjustments to the mounting surface. This prevents confusion if the fixings do not match the panel or its attachment points. For a coordinated result, mounting services for rigid signs should account for fabrication details and installation conditions together.
Availability and Project Requirements
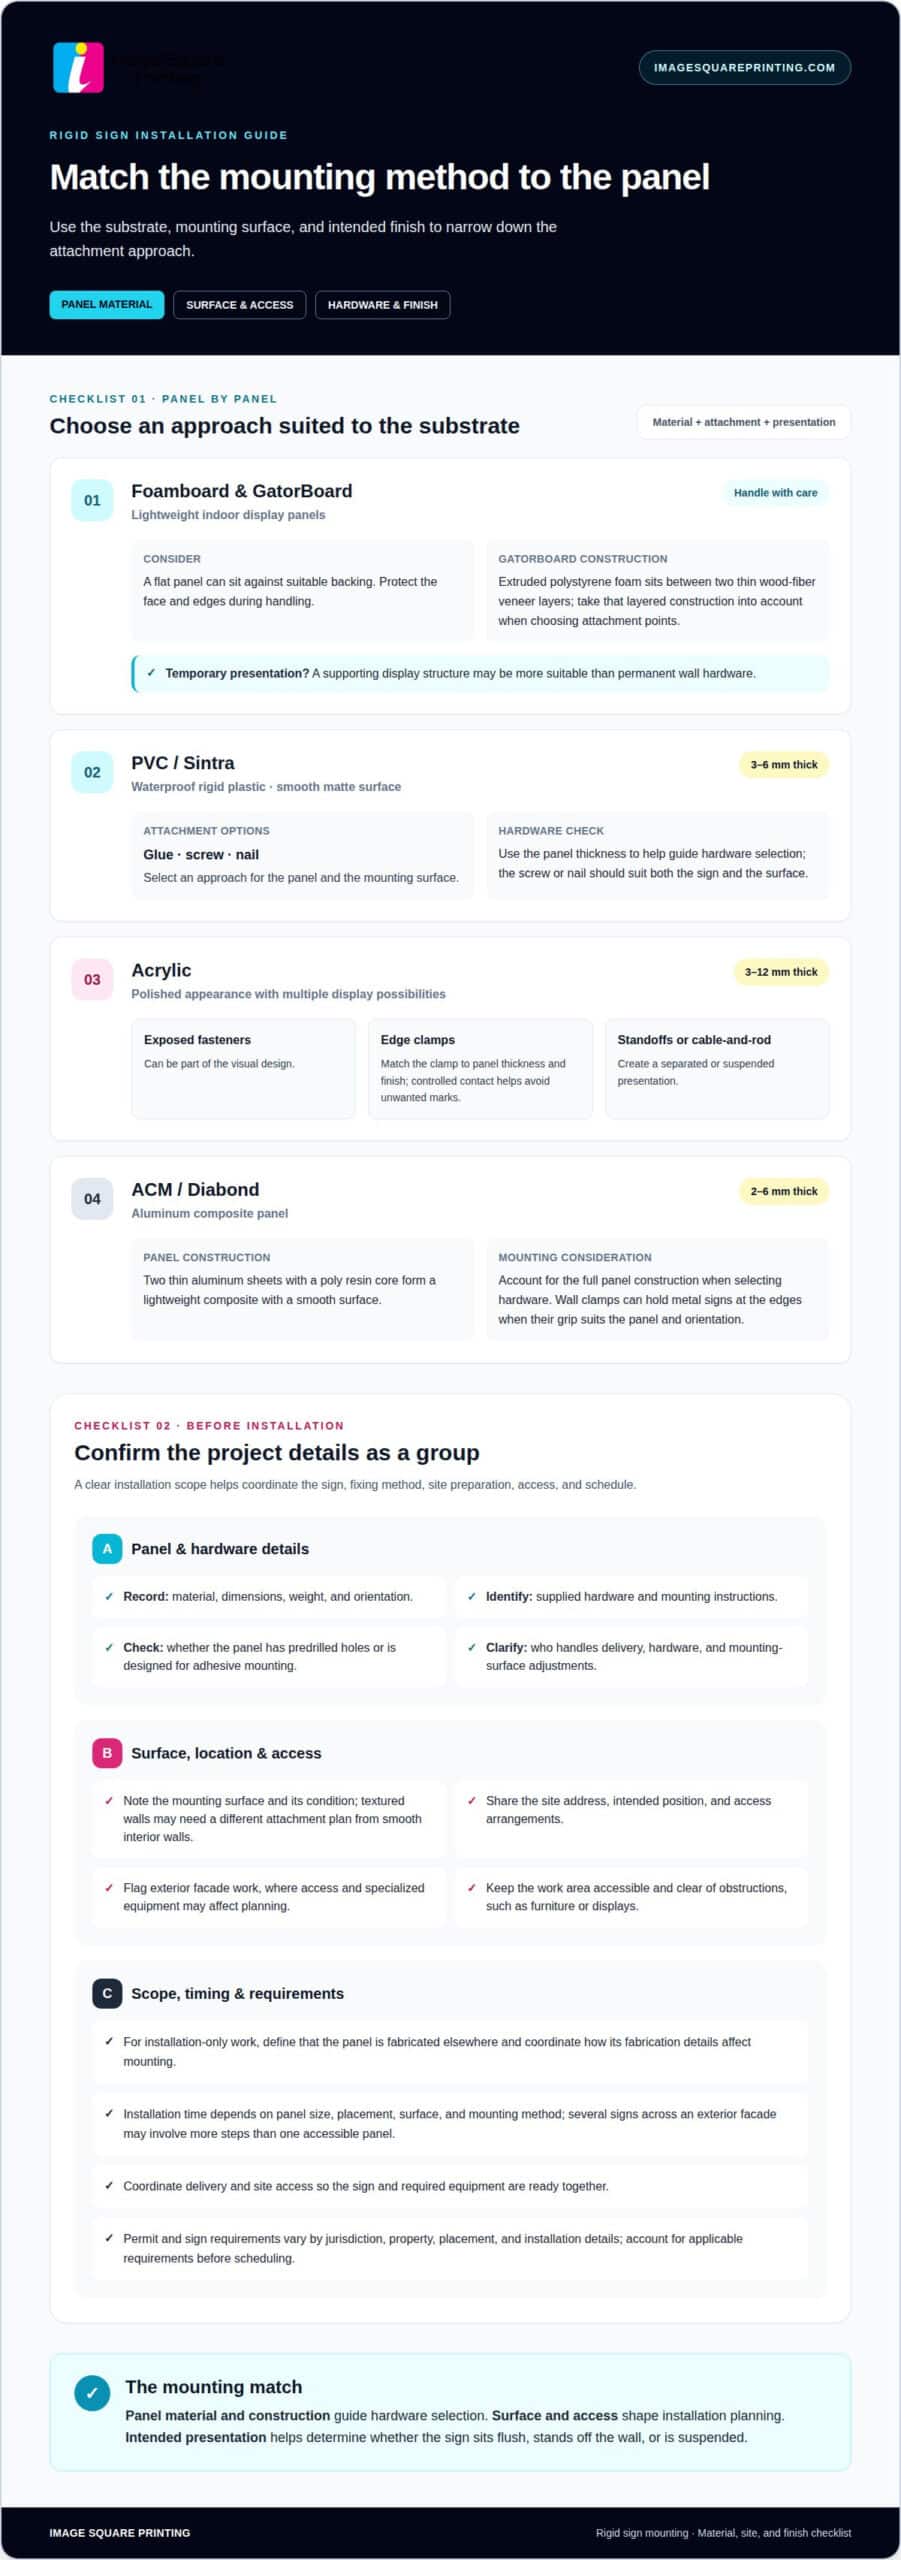
Installation planning depends on location, surface, access, and project requirements. Textured walls may need a different attachment plan from smooth interior walls. Exterior facades can require specialized equipment, depending on the material and mounting method. These factors define the scope and help determine the schedule.
Before scheduling, gather the sign’s fabrication details and mounting instructions, and prepare the site address and access arrangements. Keep the work area clean, accessible, and clear of obstructions. For example, move displays or furniture away from the mounting zone so the installer can reach the surface and position the panel.
Site Assessment and Installation Timing
During a site assessment, installers evaluate the surface, intended position, access, and equipment needs. They also check that the supplied hardware suits the panel and wall. On a textured wall, the surface condition and attachment points affect the plan. At an exterior facade, access and equipment coordination can shape the installation sequence.
Installation time depends on panel size, placement, surface, and mounting method. One accessible panel may require fewer steps than several signs across an exterior facade. Coordinate delivery and site access so the sign and required equipment are ready together. For a freestanding display, the guide to life-size cutout stands covers a separate display format.
Installer Comparisons, Permits, and Costs
When comparing mounting services for rigid signs, review the installation scope, site assessment, hardware coordination, and scheduling. Look for a clear outline of responsibilities and an explanation of how the proposed method suits the panel, surface, and access conditions.
In the United States, permit and sign requirements depend on the jurisdiction, property, placement, and installation details. Requirements may differ for indoor displays and exterior facade work, so account for them in project planning before scheduling.
Installation cost depends on the project, and a quote is provided after a request. Factors include panel size and material, hardware, surface type, access, equipment needs, and the number of locations. These conditions can also affect the installation schedule.
Mounting rigid panels made from foamboard, PVC, acrylic, and ACM
Panel material helps determine which mounting methods suit a custom sign. Match the attachment and hardware to the substrate, surface, and intended finish.
Foamboard is a lightweight choice for indoor displays, where a flat panel can be positioned against a suitable backing. GatorBoard has extruded polystyrene foam between two thin wood-fiber veneer layers, so its layered construction matters when choosing attachment points. Handle the panel carefully to protect its edges and face. For temporary presentations, a supporting display structure may be more suitable than permanent wall hardware.
PVC, also called Sintra, is a waterproof rigid plastic with a smooth matte surface. It can be glued, screwed, or nailed, giving installers several attachment approaches for different surfaces. The material is available in thicknesses from 3 to 6 mm, so the panel thickness helps guide hardware selection. A screw or nail should suit the panel and mounting surface; PVC and styrene signs illustrate this material category.
Acrylic rigid panels come in thicknesses from 3 to 12 mm. Their polished appearance can make exposed fasteners part of the visual design, or they can be held with clamps that grip the panel edges. Choose clamps compatible with the acrylic’s thickness and finish; controlled contact helps avoid unwanted marks. Acrylic sandwich panels can also sit on standoff supports or cable-and-rod display systems, creating a separated presentation that protects and enhances the print.
ACM, including Diabond, combines two thin aluminum sheets with a poly resin core. This lightweight composite has a smooth surface and comes in thicknesses from 2 to 6 mm. Its rigid face supports a refined, professional presentation, while the composite structure makes the panel’s full construction relevant to hardware decisions. Wall clamps can hold metal signs at their edges, provided their grip suits the panel and intended orientation.
Acrylic mounting boards offer another way to display prints. A sandwich-panel arrangement with standoffs separates the printed face from the wall, while cable or rod systems create a suspended look. These options suit projects where visible depth matters. For a flush presentation, choose compatible direct-mount hardware. Across foamboard, PVC, acrylic, and ACM, balance panel thickness and material with wall contact and the intended finish.
Mounting prints to art-board, Styrene, or Gator-board is the most economical substrate option. This offers a cost-conscious starting point when comparing substrate choices. The material decision can still be considered alongside the desired presentation and attachment approach, allowing economy to inform the selection without making it the only consideration. The choice should remain aligned with the project’s intended finish and how the panel will be displayed.
Wall mounting with drilled holes and metal spacers
Drilled holes and metal spacers create a display with visible depth between the panel and wall. The installer aligns the panel, marks the attachment points, drills openings suited to the hardware, then secures the spacers and sign. Accurate alignment is essential: misplaced holes can leave the panel uneven or prevent the hardware from fitting cleanly.
Before drilling, consider the panel material, mounting surface, and intended position. A rigid acrylic or aluminum sign may use hardware through prepared holes, while a textured wall can make even contact difficult. The installer assesses the surface and plans attachment points accordingly. A window may call for a different approach from a painted wall or exterior facade.
Metal spacers hold a panel away from the wall for a crisp, dimensional finish. Their visible form can complement a modern lobby sign or branded reception display. Hardware placement also shapes the appearance: evenly aligned points create balance, while inconsistent spacing can distract from the printed design. Select hardware to suit the panel’s weight and construction.
Drilled mounting is only one way to display graphics. Wall graphics and wall murals use printed material applied across a surface rather than a rigid panel held by spacers. A mural can cover a broad wall area, while a smaller wall graphic can identify a room or highlight a brand element. Custom wall coverings bring printed visuals directly onto wall surfaces.
Window graphics suit a different purpose and surface. A window decal can display a logo, message, or visual on glass. Position it with the view through the window and the design’s intended visibility in mind. Unlike a drilled panel, a graphic applied to glass uses no spacer hardware or panel holes, so its installation method depends on the printed material.
Floor graphics use a surface-applied format for directional or promotional visuals underfoot. Position them so the message is easy to see without competing with nearby signs. A rigid panel with spacers suits a dimensional wall display; a wall mural, window graphic, or floor graphic covers a broader surface. Match the format to the site to keep each sign clear and purposeful.
For a project combining drilled panels and surface graphics, plan each element around its location. A reception wall might feature a spacer-mounted acrylic sign, with a separate window graphic on adjacent glass. Confirming the surface, visual hierarchy, and installation method for each piece helps coordinate the printing and mounting details.
Diabond mounting
Diabond combines two thin aluminum sheets with a poly resin core. Its smooth face and lightweight construction suit clean, professional sign displays. The available panel thicknesses range from 2 to 6 mm, so mounting plans should account for the selected panel. Start by matching the attachment method to the sign’s size, position, and supporting surface.
Before mounting, inspect the panel and confirm its orientation. Decide whether it should sit flush against a wall or stand away from it. A lobby sign, for example, may use visible standoffs for added depth, while a directory panel may need a flatter presentation. Let the mounting surface and the sign’s role guide the choice.
For drilled mounting, plan the attachment points before making holes. They should align with the wall hardware and support the panel evenly. Marking them against the intended position helps keep the sign level and prevents the design from shifting during installation. Choose fixings suited to both the Diabond panel and the mounting surface.
Standoffs separate a Diabond panel from its backing surface. They can give a reception display a dimensional finish without covering the printed face. Cable or rod systems offer another suspended presentation for suitable panel arrangements. Each option changes the sign’s position and visual profile, so compare the planned look with the room and surrounding graphics.
Indoor placement often focuses on sightlines, nearby lighting, and how the display relates to other signs. A wall-mounted brand panel should remain visible without competing with adjacent messaging. For an exterior facade, the installer considers access, surface condition, and equipment needs. Those factors shape the installation plan rather than the panel material alone.
Coordinate Diabond installation with sign delivery and any site work. Keep the mounting area accessible, with the panel and chosen hardware ready together. For a multi-panel display, label each panel by position before installation. This helps the installer follow the approved layout and distinguish matching sections.
Diabond differs from surface-applied decals. A decal follows a wall, window, or other surface, while a rigid panel needs a support or attachment system. Choose a panel when the design calls for a distinct, structured sign face; choose a decal when the visual should integrate directly with the surface. When utilizing professional mounting services for rigid signs from Image Square Printing, this distinction helps align the material and mounting method with the intended presentation.
Diabond is a lightweight composite with a smooth surface, made of two thin aluminum sheets and a poly resin core, making it an ideal choice for durable and elegant signage solutions.
Hardware and placement recommendations
Choose mounting hardware based on the sign’s material, display format, and location. A rigid panel for an indoor lobby has different placement demands from an outdoor sign facing passing traffic. The mounting surface matters too: a smooth wall, glass window, and freestanding support each call for a different plan. Start with the viewing position, then match the hardware to the panel and site.
Consider how people will encounter the sign. A reception display should be easy to spot from the entrance, while directional signage should appear before visitors reach a turn. For an outdoor display, assess visibility from the approach path and surrounding area. If a doorway, fixture, or another sign hides key text, the message loses impact, even when the panel is well made.
Hardware should support the sign without distracting from its design. Exposed fasteners can create a crisp, industrial look; concealed attachment keeps attention on the printed face. Metal clamps may suit some metal or acrylic panels, while a freestanding support avoids wall attachment. Choose hardware to match the panel construction and mounting surface, not appearance alone.
- Indoor wall: Place a lobby panel near the natural entry sightline and keep adjacent graphics from competing with it.
- Glass window: Position the message where it remains visible without obscuring the intended view through the glass.
- Outdoor location: Consider approach direction, surface access, and whether installation requires specialized equipment.
- Temporary display: Use a lightweight format when quick repositioning matters more than permanent placement.
Some signs suit a simple self-service setup. Yard signs, A-frames, small decals, and lightweight posters can be straightforward to position. An A-frame, for example, can display a message near an entrance, while a yard sign can stand beside a property. A large rigid panel mounted on a wall needs a more deliberate match between attachment method and surface.
Plan the sign, mounting hardware, and placement together before installation. Identify the intended height and orientation, then consider nearby doors, windows, and displays. For a multi-sign project, map each location so the panels maintain a consistent visual order. This helps the finished format serve its purpose, whether it guides visitors, promotes a property, or reinforces a brand.
Use the placement and hardware plan to shape your next sign project. Plan a sign display around its location, format, and intended audience.
Image Square Printing
Image Square Printing produces custom printed materials and provides professional finishing to help turn a sign concept into a polished display. If you’re deciding how a rigid panel should work alongside event or business graphics, the team can help coordinate the approach for the setting and presentation.
For a different display format, Image Square Printing offers retractable banner stands, custom wall covering, and Step and Repeat Backdrops. These can complement a rigid sign in a lobby, at an event, or in a branded space, while meeting different display needs.
Contact Image Square Printing to discuss your sign project and the visual format that fits its setting.
Plan the Next Step for Your Sign
The mounting decision also shapes how a space communicates. Treat the panel as part of a wider visual system: its placement, surrounding graphics, and supporting displays can work together to guide attention and reinforce a consistent brand experience. A focused project brief can define the panel’s purpose, setting, and intended impression.
For a broader branded setting, Image Square Printing also offers retractable banner stands, custom wallpaper printing, and custom wall covering. These formats can complement a rigid sign in event spaces, customer areas, or workplace interiors, without forcing every message into the same display format. Start with the audience and the role each visual element should play.
Whether you’re planning one custom panel or a coordinated environment, clear decisions about placement and presentation help move the project forward. Consider how mounting services for rigid signs fit your next display, then define the visual direction and formats that support your goals. Contact Image Square Printing to begin planning your project with confidence.
Frequently Asked Questions
How can I hang or display my custom rigid sign?
Choose a display method that suits the sign’s purpose and surrounding space. For a single panel, map its intended position with a paper template and check alignment from the main viewing angle. Then choose a compatible attachment or display support. An event sign may need to be repositionable, while a permanent branded panel benefits from a fixed, coordinated presentation.
What types of rigid signs can installers mount?
Panels made from foamboard, Gatorboard, PVC, acrylic, and aluminum composite materials such as Diabond each call for suitable handling and hardware. Material and construction influence the choice: a custom acrylic sign may suit a polished, dimensional presentation, while an aluminum panel can work for a business display. The intended location and finish help determine the installation approach.
What mounting methods are used for rigid signs on different surfaces?
Mounting methods vary by panel and surface. A wall display might use direct attachment or spacers, while a freestanding support avoids fixing the panel to a wall. Glass displays and surface graphics require different approaches from drilled panels. For a multi-surface project, such as a lobby with a wall sign and glass graphics, plan each piece for its surface and viewing purpose.
What are the risks of DIY rigid sign mounting versus professional installation?
DIY mounting can result in a crooked display, mismatched hardware, or damage to the panel or surface. Handling a large panel or reaching an exterior facade can also make positioning more difficult. Professional installation is useful when a sign is large, the surface is textured, or access and equipment need coordination. A simple yard sign or A-frame is often easier to position independently.
How much does professional rigid sign installation cost?
Installation cost depends on panel size and material, hardware, surface type, access, equipment needs, and the number of locations. Request a quote for project pricing.
How long does rigid sign installation take?
Installation time depends on panel size, placement, surface, and mounting method. An accessible panel may take fewer steps to install than several signs across an exterior facade.