Want to turn heads with eye-catching poster art? Let’s dive into the world of wheat paste poster prints! This age-old technique combines creativity with an easy-to-make paste that sets your artwork apart.
Picture this: vibrant posters showcasing your designs plastered on walls, fences, or even rusty doors. Wheat pasting is not only an art form but also a powerful way to share your message with the world.
Ready to learn the magic behind wheat paste? Whether you’re an artist, an activist, or just someone who loves DIY projects, this guide will help you create stunning posters that demand attention. Get your materials ready and prepare to unleash your inner artist!
Understanding Wheat Paste Poster Prints
Wheat paste poster prints are an artistic way to make your mark on urban landscapes. They blend bold imagery with an adhesive made from simple, natural ingredients: flour and water. This creates a durable, eco-friendly paste that’s easy to make at home.
The History of Wheat Pasting
Wheat pasting has a rich history dating back to ancient Egypt, but it gained popularity in the modern world through street art and guerrilla marketing. Artists loved how accessible and effective it was for sharing their visions on a larger scale.
Why Choose Wheat Paste?
The beauty of wheat paste lies in its versatility. It’s cheap, biodegradable, and can adhere to a variety of surfaces. Plus, it’s a perfect medium for both temporary and semi-permanent displays, allowing your artwork to weather the elements while maintaining its charm.
Intrigued by how it all works? Let’s delve deeper into the materials and steps needed to make your own stunning wheat paste poster prints. Ready to get your hands a little messy?
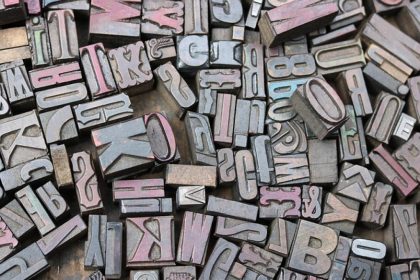
Choosing the Right Paper for Your Poster
Picking the right paper is crucial for creating a wheat paste poster that stands out. First, you’ll want a paper that can hold up against weather conditions, especially if you’re planning to display your poster outdoors. Sturdy, yet flexible paper is your best bet.
Consider the texture of the paper. A slightly textured surface can add a unique visual element to your artwork. However, too much texture can make it harder for the paste to adhere, so finding a balance is key.
White or light-colored paper is often best for making your designs pop. It provides a clean canvas that ensures your colors and lines are crisp and clear.
Thickness matters too. A thicker paper might seem ideal, but it can be harder to work with and less likely to mold to uneven surfaces. Opt for something in the middle—thick enough to be durable but thin enough to be flexible.
Remember, experimentation is part of the process. Try different types of paper and see which works best for your specific project. Happy pasting!
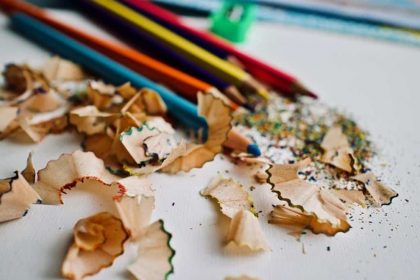
Preparing Your Artwork for Wheat Paste
Creating eye-catching artwork for your wheat paste poster is the fun part! Start by brainstorming your design. Think about the message you want to convey and how to best visualize it. Bold colors and clear, strong lines often work well.
Once you have a concept, it’s time to bring it to life. Digital tools, like graphic design software, can help you refine your work. If you’re more the hands-on type, sketch out your ideas on paper first. No matter your method, make sure your design is high-resolution to ensure it looks sharp when printed.
Test Prints
Before going big, do a few test prints. This helps you catch any issues with color or clarity. Adjust as necessary until you’re happy with the final result.
Next, consider the size of your poster. Large formats can have a significant visual impact, but they also require more effort when it comes to pasting. Make sure your design scales well to the size you choose.
Finally, prepare your artwork for printing by setting the file in the correct format, usually PDF is a safe choice. Double-check everything, from alignment to color accuracy, to ensure your poster turns out just as you envisioned it.
Applying Wheat Paste to Create Vibrant Prints
Now that your artwork is ready, it’s time to mix your wheat paste. You’ll need a few basic ingredients: flour, water, and a pinch of sugar to add some stickiness. Mix them together over low heat until you get a smooth, thick consistency. Let it cool before using.
Prepping the Surface
Find a clean, smooth surface for your poster. Rough or dirty surfaces can make it harder for the paste to stick. Brush off any dust or dirt, and if possible, lightly dampen the area to help the paste adhere better.
When you’re ready, grab a brush and apply a thin, even layer of paste to the back of your print. Starting from the center, smooth out any bubbles or wrinkles with your hands or a soft cloth.
Securing the Poster
Next, apply more paste over the top of the poster to seal it. This second layer will help protect your artwork from the elements and ensure it stays vibrant for longer. Make sure the edges are well-pasted to prevent them from peeling up over time.
Once your poster is securely in place, step back and admire your work! The combination of your unique artwork and carefully applied wheat paste should create a striking display that draws attention. Remember, practice makes perfect. The more you work on your wheat paste technique, the better your results will be.
Enhancing the Poster’s Durability and Longevity
To keep your poster looking fresh for as long as possible, there are a few additional steps you can take. First, consider applying a clear sealant over the dried paste layer. This will act as a protective barrier against weather and wear. There are several types of sealants available, so choose one that’s suitable for outdoor use.
Keeping your poster out of direct sunlight can greatly increase its lifespan. UV rays can cause colors to fade over time, making your vibrant artwork look washed out. If possible, place your poster in a shaded area or use UV-resistant sealant to help combat sun exposure.
Temperature and humidity can also affect your poster’s durability. Extreme conditions can weaken the paste, causing your poster to peel or bubble. Keep a close eye on the weather and try to put up your posters during moderate conditions.
Finally, periodic maintenance can extend your poster’s life. Check on it regularly and reapply paste to any edges that may start to lift. A little touch-up here and there can make a big difference in keeping your poster intact and looking great. With these tips, your beautiful print should be able to withstand the elements and maintain its vibrant appeal much longer.
The Bottom Line: Showcasing Your Masterpiece
So, there you have it! Creating and displaying your very own poster can be a fun and rewarding experience. From selecting the perfect paper to applying protective sealants, each step plays a role in bringing your vision to life and ensuring it endures.
Always remember, the quality of your materials matters. Using the right type of paper and adhesive can make a significant difference in how well your poster holds up over time. Taking extra measures like applying a sealant and placing your poster in a shaded area will go a long way in preserving its colors and details.
Don’t forget about the environment where your poster will be displayed. Whether it’s indoors or outdoors, consider factors like weather, sunlight, and humidity. These small considerations can have a big impact on the longevity of your artwork. And, a little maintenance every now and then can keep your poster looking as good as new.
Ultimately, showcasing your masterpiece is a chance to share your creativity with the world. Whether it’s for an event, a piece of art, or a message you want to spread, your poster can capture attention and inspire others. By following these tips and tricks, your poster will not only look fantastic but will also stand the test of time.
So go ahead, take pride in your work, and let your masterpiece shine for all to see!