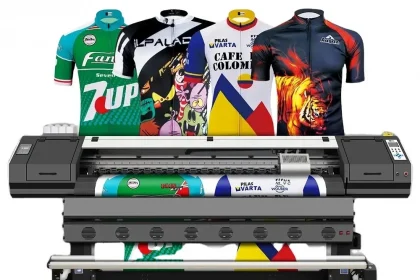
Have you ever wondered how signs, logos, or designs get printed onto shiny mirror surfaces? It might seem impossible, but with the right techniques, you can achieve stunning results.
One of the coolest things about printing on mirrors is the way light interacts with both the design and the reflective surface. This can make colors pop and designs stand out in an eye-catching way.
Whether you’re looking to create custom mirrors, unique décor, or eye-catching business signs, mastering the art of printing on mirrors opens up a world of creative possibilities. Ready to dive in? Let’s explore some of the best techniques to accomplish this glossy, reflective magic!
Understanding the Printing Surface
Before diving into techniques, it’s crucial to understand the nature of mirror surfaces. Mirrors are not just flat pieces of glass; they have a reflective coating, usually made of aluminum or silver, applied to the back.
This reflective layer is sensitive and can affect how ink or paint adheres. It’s especially important to handle mirrors carefully to avoid scratches or damage to this coating.
Additionally, the smoothness of a mirror surface means that traditional printing methods, which work well on porous or textured surfaces, might not be as effective. This slick quality requires specialized inks and adhesion techniques to ensure the design stays put.
Choosing the Right Printing Method
Selecting the right printing method is a game-changer. For mirrors, some techniques work better than others. One popular choice is UV printing. It’s ideal because the ink cures quickly under UV light, creating a durable print that resists smudging and fading.
Another option is screen printing. Though more traditional, it works well with specialized inks designed to adhere to glass surfaces. The result is usually vibrant and long-lasting.
Vinyl decals offer a versatile approach. They can be cut into intricate designs and applied to the mirror’s surface with ease. Plus, they’re removable, making them perfect for temporary or seasonal designs.
Lastly, consider using etching. While not a printing method per se, etching permanently alters the surface of the mirror to create a design. It’s subtle but elegant and won’t fade over time.
By aligning your project’s needs with the strengths of these methods, you can achieve stunning results on your mirror prints.
Prepping the Mirror Surface
Getting your mirror ready is a critical step in achieving a flawless print. First, you need to clean the surface thoroughly. Any dust, smudges, or fingerprints can affect the final result. Use a glass cleaner and a lint-free cloth to make sure the mirror is spotless.
It’s also important to ensure the mirror is completely dry before you start printing. Even a tiny bit of moisture can interfere with the adhesive or ink, leading to a less-than-perfect finish.
Handling the Mirror
Handle the mirror by its edges to avoid reintroducing any dirt or oils from your hands. Wearing gloves can also help keep the surface pristine.
If you’re using vinyl decals, testing a small piece first to ensure good adhesion is a smart idea. This will help you avoid any surprises once you apply the full design.
By taking the time to properly prep your mirror, you set the stage for a successful and beautiful print. Don’t rush this part; a little patience goes a long way.

Optimizing Design for Reflective Printing
When working with a mirror surface, the design becomes even more crucial. Reflective surfaces can create unique effects, so you need to tailor your design to make the most of them.
Choosing the Right Colors
Bright, bold colors often work best. They stand out and catch the light, creating a stunning visual impact. Avoid light or pastel colors, as they might get lost in the reflection.
Think about contrast as well. Strong contrasts can help your design pop against the mirror’s reflective background. Darker colors can bring depth, while white or metallic accents can add a touch of brilliance.
Design Elements
Keep your design clean and simple. Complex patterns can get confusing with reflections and might not print as clearly. A minimalist approach often yields the best results on mirror surfaces.
Also, consider the placement of your design. Centering it might seem like an obvious choice, but off-center designs can create an interesting, dynamic look.
By focusing on these elements, you can turn a straightforward print into a truly eye-catching piece of art. Happy designing!
Testing and Troubleshooting
Before you commit to a full print run, it’s crucial to test your design on the reflective surface. This helps catch any issues early and saves you time and resources.
Print a Sample
Start by printing a small sample of your design. This allows you to see how the colors and elements appear on the mirror finish. Look closely at how the light interacts with the print and make sure the design is as vibrant and clear as you envisioned.
Check for any distortions or blurriness. If your design looks sharp on paper but not on the mirror, you might need to adjust your settings or simplify your elements.
Addressing Common Issues
Sometimes, the colors might not appear as expected. This could be due to the reflective nature of the surface. Try tweaking the color profiles or using a different printing mode to enhance the vibrancy.
If the ink smudges or doesn’t adhere well, consider the type of ink and its compatibility with reflective surfaces. You might need to switch to a specialized ink formulated for such materials.
Always document any changes you make during testing. This way, you can easily replicate the successful setup for the final print run. A little testing can go a long way in ensuring your design turns out perfectly!
Conclusion: Achieving High-Quality Results
In wrapping up, it’s clear that attention to detail is key when printing on reflective surfaces. The right preparation, including understanding your materials and design intricacies, sets the foundation for success.
Testing small prints before a full run can’t be stressed enough. It allows you to catch and rectify any issues, ensuring the final product is flawless. By adjusting your color profiles and using compatible inks, you can achieve vivid prints that pop against the reflective backdrop.
Remember, documentation is your friend. Keep track of settings, materials, and any changes made during testing. This way, reproducing high-quality prints becomes a straightforward task.
Don’t forget the finishing touches. Protect your prints with a sealant if necessary to preserve their quality and longevity. Paying attention to these final steps ensures your printed design not only looks great but stands the test of time.
With patience and a bit of experimentation, you’ll find that printing on reflective surfaces is not only possible but can yield stunning results. Embrace the challenge, and you’ll be rewarded with prints that truly shine.


