Using Digital Imaging Technology For Printing
Ever wondered how those vibrant posters, sharp photographs, and eye-catching banners come to life? The magic lies in digital imaging technology. It’s a game-changer in the world of printing!
Digital imaging technology has revolutionized the printing industry, making it faster, more efficient, and incredibly precise. Gone are the days of time-consuming processes and imperfect results. Now, with just a few clicks, you can transform your digital designs into stunning printed materials.
In this blog post, we’ll dive into how digital imaging technology works and the advantages it brings. Whether you’re a seasoned professional or just curious about how your favorite prints are made, there’s something here for everyone. So, keep reading to discover the fascinating world of digital imaging and printing!
Digital Imaging in Printing Environment
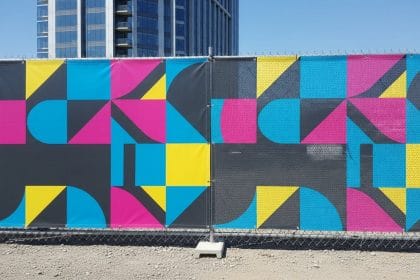
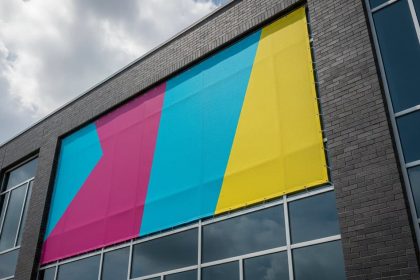
Digital imaging technology has simplified the printing process remarkably. In a printing environment, everything starts with a high-resolution digital file. This file can be created using software like Adobe Photoshop or Illustrator and then converted into a printable format.
![]()
One of the standout features of digital imaging is its precision. Every pixel in your digital artwork is translated into exact ink placement on paper, ensuring that colors are consistent and details are immaculate. This level of accuracy is hard to achieve with traditional printing methods.
Moreover, digital imaging allows for quick adjustments. Need to tweak a color or resize an image? It’s all possible with minimal effort. This flexibility makes digital imaging a favorite among designers and print operators alike.
Lastly, digital imaging is eco-friendly. Traditional printing often involves a lot of waste, but digital printing requires fewer resources and produces less waste. It’s a sustainable choice that aligns perfectly with modern, eco-conscious values.
So, whether you’re printing glossy magazines, striking business cards, or large-format posters, digital imaging technology ensures your prints will be top-notch every single time.
How to Convert Low Res Images to Hi Res Images
Got a great image but it’s too low resolution? Don’t worry, you can enhance it!
First, try using specialized software like Adobe Photoshop. Open your image and navigate to “Image Size” under the “Image” menu. Here, you can input your desired resolution. Use the “Preserve Details” resampling method for the best results. We have our own enhancement software that we can do it for you as well.
If Photoshop isn’t an option, there are online tools like Let’s Enhance or Waifu2x. These platforms use artificial intelligence to upscale images without losing quality. Simply upload your low-res image, select your settings, and let the tool work its magic.
For better control, use a manual approach. Break down the image using a vector graphics editor like Adobe Illustrator. Convert your image to a vector, then scale it up to your desired resolution. This method requires more effort but offers excellent results.
Remember, increasing resolution won’t add new details but will smooth out the existing ones, making your image appear crisper. So, while these methods can help, starting with the highest quality image available is always the best choice.
How to Scale Captured Photos to Be Used in Large Format Print
Scaling a captured photo for large format print can seem daunting, but it’s quite straightforward with the right approach!
Start by capturing the highest resolution image possible. This gives you more pixels to work with, crucial for maintaining quality when scaling up.
Next, use a photo editing software like Adobe Photoshop. Open your image and go to the “Image Size” option. Ensure “Resample” is checked and set the resampling method to “Bicubic Smoother” for enlarging. Input the desired dimensions and confirm.
For even better results, consider using software like ON1 Resize, which is specifically designed for upsizing images while preserving detail. These tools utilize algorithms that intelligently add pixels to your photo, maintaining clarity.
Additionally, you can employ vector graphic tools if your image consists of clean lines and shapes. Convert your photo into a vector format using programs like Adobe Illustrator, making it easy to scale without losing quality.
Lastly, always preview a small section of your upscaled image at full size. This will help you catch any issues before sending it off to print. With these steps, your photos will look stunning, even in large formats.